I think 99% of the planet has discovered the awesomeness that is Pinterest. There is such a huge plethora of information from recipes, to health and beauty, to LOL memes, and everything in between.
In keeping with our Handmade Christmas series, I wanted to share with you some of my favorite Pinterest projects. Some of these I plan to use myself, some I only wish I could complete! Enjoy!
Teacup Candles My mom collects teacups, and so this one immediately caught my attention. Every year the adults in my family throw names into a hat and everyone draws their Secret Santa. I knew if I got my mom's name I would be making this, but alas, I might have to wait until Mother's Day. You could find beautiful cups at a thirft store or garage sales, and even with the cost of the wax, you are spending mere pennies for a beautiful handmade gift!
Fuzzy Slippers These are just yummy! Whatever fabric your {recipient's} heart desires, coupled with soft, sumptuous insides.. anyone would be delighted to receive these!
Trendy Pillows Everyone loves when their home is warm, inviting, and beautiful. Giving your friend or loved one a beautiful handmade pillow that compliments their home is so thoughtful!
Fun Fleece Hats Little ones will have so much fun with these easy peasy to make fleece hats! Even if you don't live in a super cold climate, they'll don them and have FUN!
Coffee Cozy FINALLY! A gift you can give a man! Or woman. Well, maybe some men would dig the fleece hats as much as kids, but this one can go to a may-un. Macho it up with buttons, boy colors, and he can wrap his decaf mocha latte with nonfat whip in testosterone infused style.
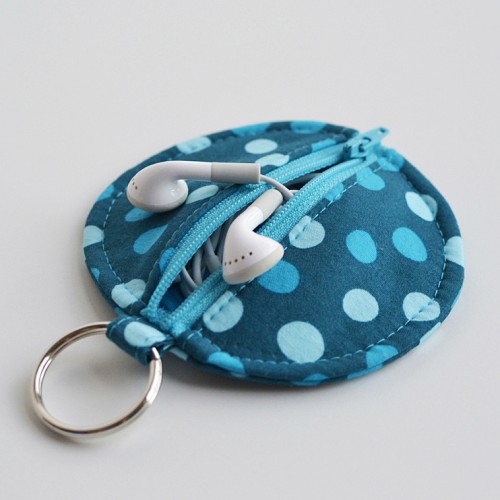
Earbud Case Say you have a Sister. I do. Say she is connected with her ipod like it's her umbilical cord and it's still attached. Mine does. Say she doesn't always keep up with her headphones so well. Mind doesn't. Or that, perhaps, when she comes to visit your kids take her earbuds and rip them, chew them, or jump on them. Mine don't... but yours probably do. This nifty little gift is a way to help your sister keep up with her earbuds, and away from your kids. Yours. Not mine. Because mine don't do that kind of thing.
There are so many fantastic ideas on Pinterest, and I hope you garner some inspiration from my ideas! Follow me on Pinterest through any of the above links, and keep up with my new pins!
In keeping with our Handmade Christmas series, I wanted to share with you some of my favorite Pinterest projects. Some of these I plan to use myself, some I only wish I could complete! Enjoy!
Teacup Candles My mom collects teacups, and so this one immediately caught my attention. Every year the adults in my family throw names into a hat and everyone draws their Secret Santa. I knew if I got my mom's name I would be making this, but alas, I might have to wait until Mother's Day. You could find beautiful cups at a thirft store or garage sales, and even with the cost of the wax, you are spending mere pennies for a beautiful handmade gift!
Fuzzy Slippers These are just yummy! Whatever fabric your {recipient's} heart desires, coupled with soft, sumptuous insides.. anyone would be delighted to receive these!
Pajama Pants If you're like me, you buy your kids Christmas PJs every year. This year I'm going to make them myself, save a few $$, and have WAY more cherished memories because of it!
Cute Bags Have a teen, young adult, or grown woman on your list? Make them a bag. You simply can't go wrong! And my favorite thing about this is you can personalize the style and functionality for the person in mind.
Handmade Bracelets This is a lovely collection of easy to make bracelets. Woman - Jewelry = WIN!
Coffee Cozy FINALLY! A gift you can give a man! Or woman. Well, maybe some men would dig the fleece hats as much as kids, but this one can go to a may-un. Macho it up with buttons, boy colors, and he can wrap his decaf mocha latte with nonfat whip in testosterone infused style.
Earbud Case Say you have a Sister. I do. Say she is connected with her ipod like it's her umbilical cord and it's still attached. Mine does. Say she doesn't always keep up with her headphones so well. Mind doesn't. Or that, perhaps, when she comes to visit your kids take her earbuds and rip them, chew them, or jump on them. Mine don't... but yours probably do. This nifty little gift is a way to help your sister keep up with her earbuds, and away from your kids. Yours. Not mine. Because mine don't do that kind of thing.
There are so many fantastic ideas on Pinterest, and I hope you garner some inspiration from my ideas! Follow me on Pinterest through any of the above links, and keep up with my new pins!


